The road to nirvana |
|
My journey into Photography, Horology, and Audiophilia |

Building a general-purpose environment sensors
July 27, 2020
Last year, I bought the MQ-135 sensor to build a gas leak detector for the house but the project didn't materialize, until today...
The new plan is to build a multi-sensor device to monitor the enclosure I am building. The MQ-135 will be repurposed as a smoke detector which will then drive a relay to cut off the AC power going to the Snapmaker 2 A250. The DHT-11 temperature and humidity sensor could be used for something else, like trigger an exhaust fan when a certain temperature is exceeded.
Materials
I'm going to use materials that are readily available from Lazada for convenience. The indicated prices are in Philippine Peso.
| Quantity | Description | Unit Price | Total |
| 1 | WeMos ESP8266 ESP-12 USB D1 Mini WIFI | 269.00 | 269.00 |
| 1 | Relay Module - 10A - 1 Channel | 75.00 | 75.00 |
| 1 | DHT11 Digital Temperature/Humidity Sensor Module | 105.00 | 105.00 |
| 1 | DC DC Buck / Step Down 5A XL4005 | 99.00 | 99.00 |
| 1 | Gas Sensor MQ135 | 145.00 | 145.00 |
3D printed parts
- Simple housing
The parts selection process
Initially, I wanted to use my ESP-12F as the main controller for this project because it has Wi-Fi, but my soldering iron broke (to solder solid wires for the breadboard) and I got lazy so just ordered the WeMos D1 mini that has the same microcontroller, plus USB, and proper pins for breadboarding.
The DHT-11 sensor comes with both humidity and temperature sensors so how can I complain, it also has a very small footprint.
There are so many sensors under the MQ banner and MQ-135 is one of them, chosen because supposedly it can detect "smoke."
The relay is mostly used for Arduino projects, the JQC-3FF-S-Z 10A. This is a normally closed relay which is perfect for continued connection unless the trigger pin goes high and switches to open. I can then trigger this pin to go high when certain parameters are exceeded, like CO2 or temperature.
Prototype
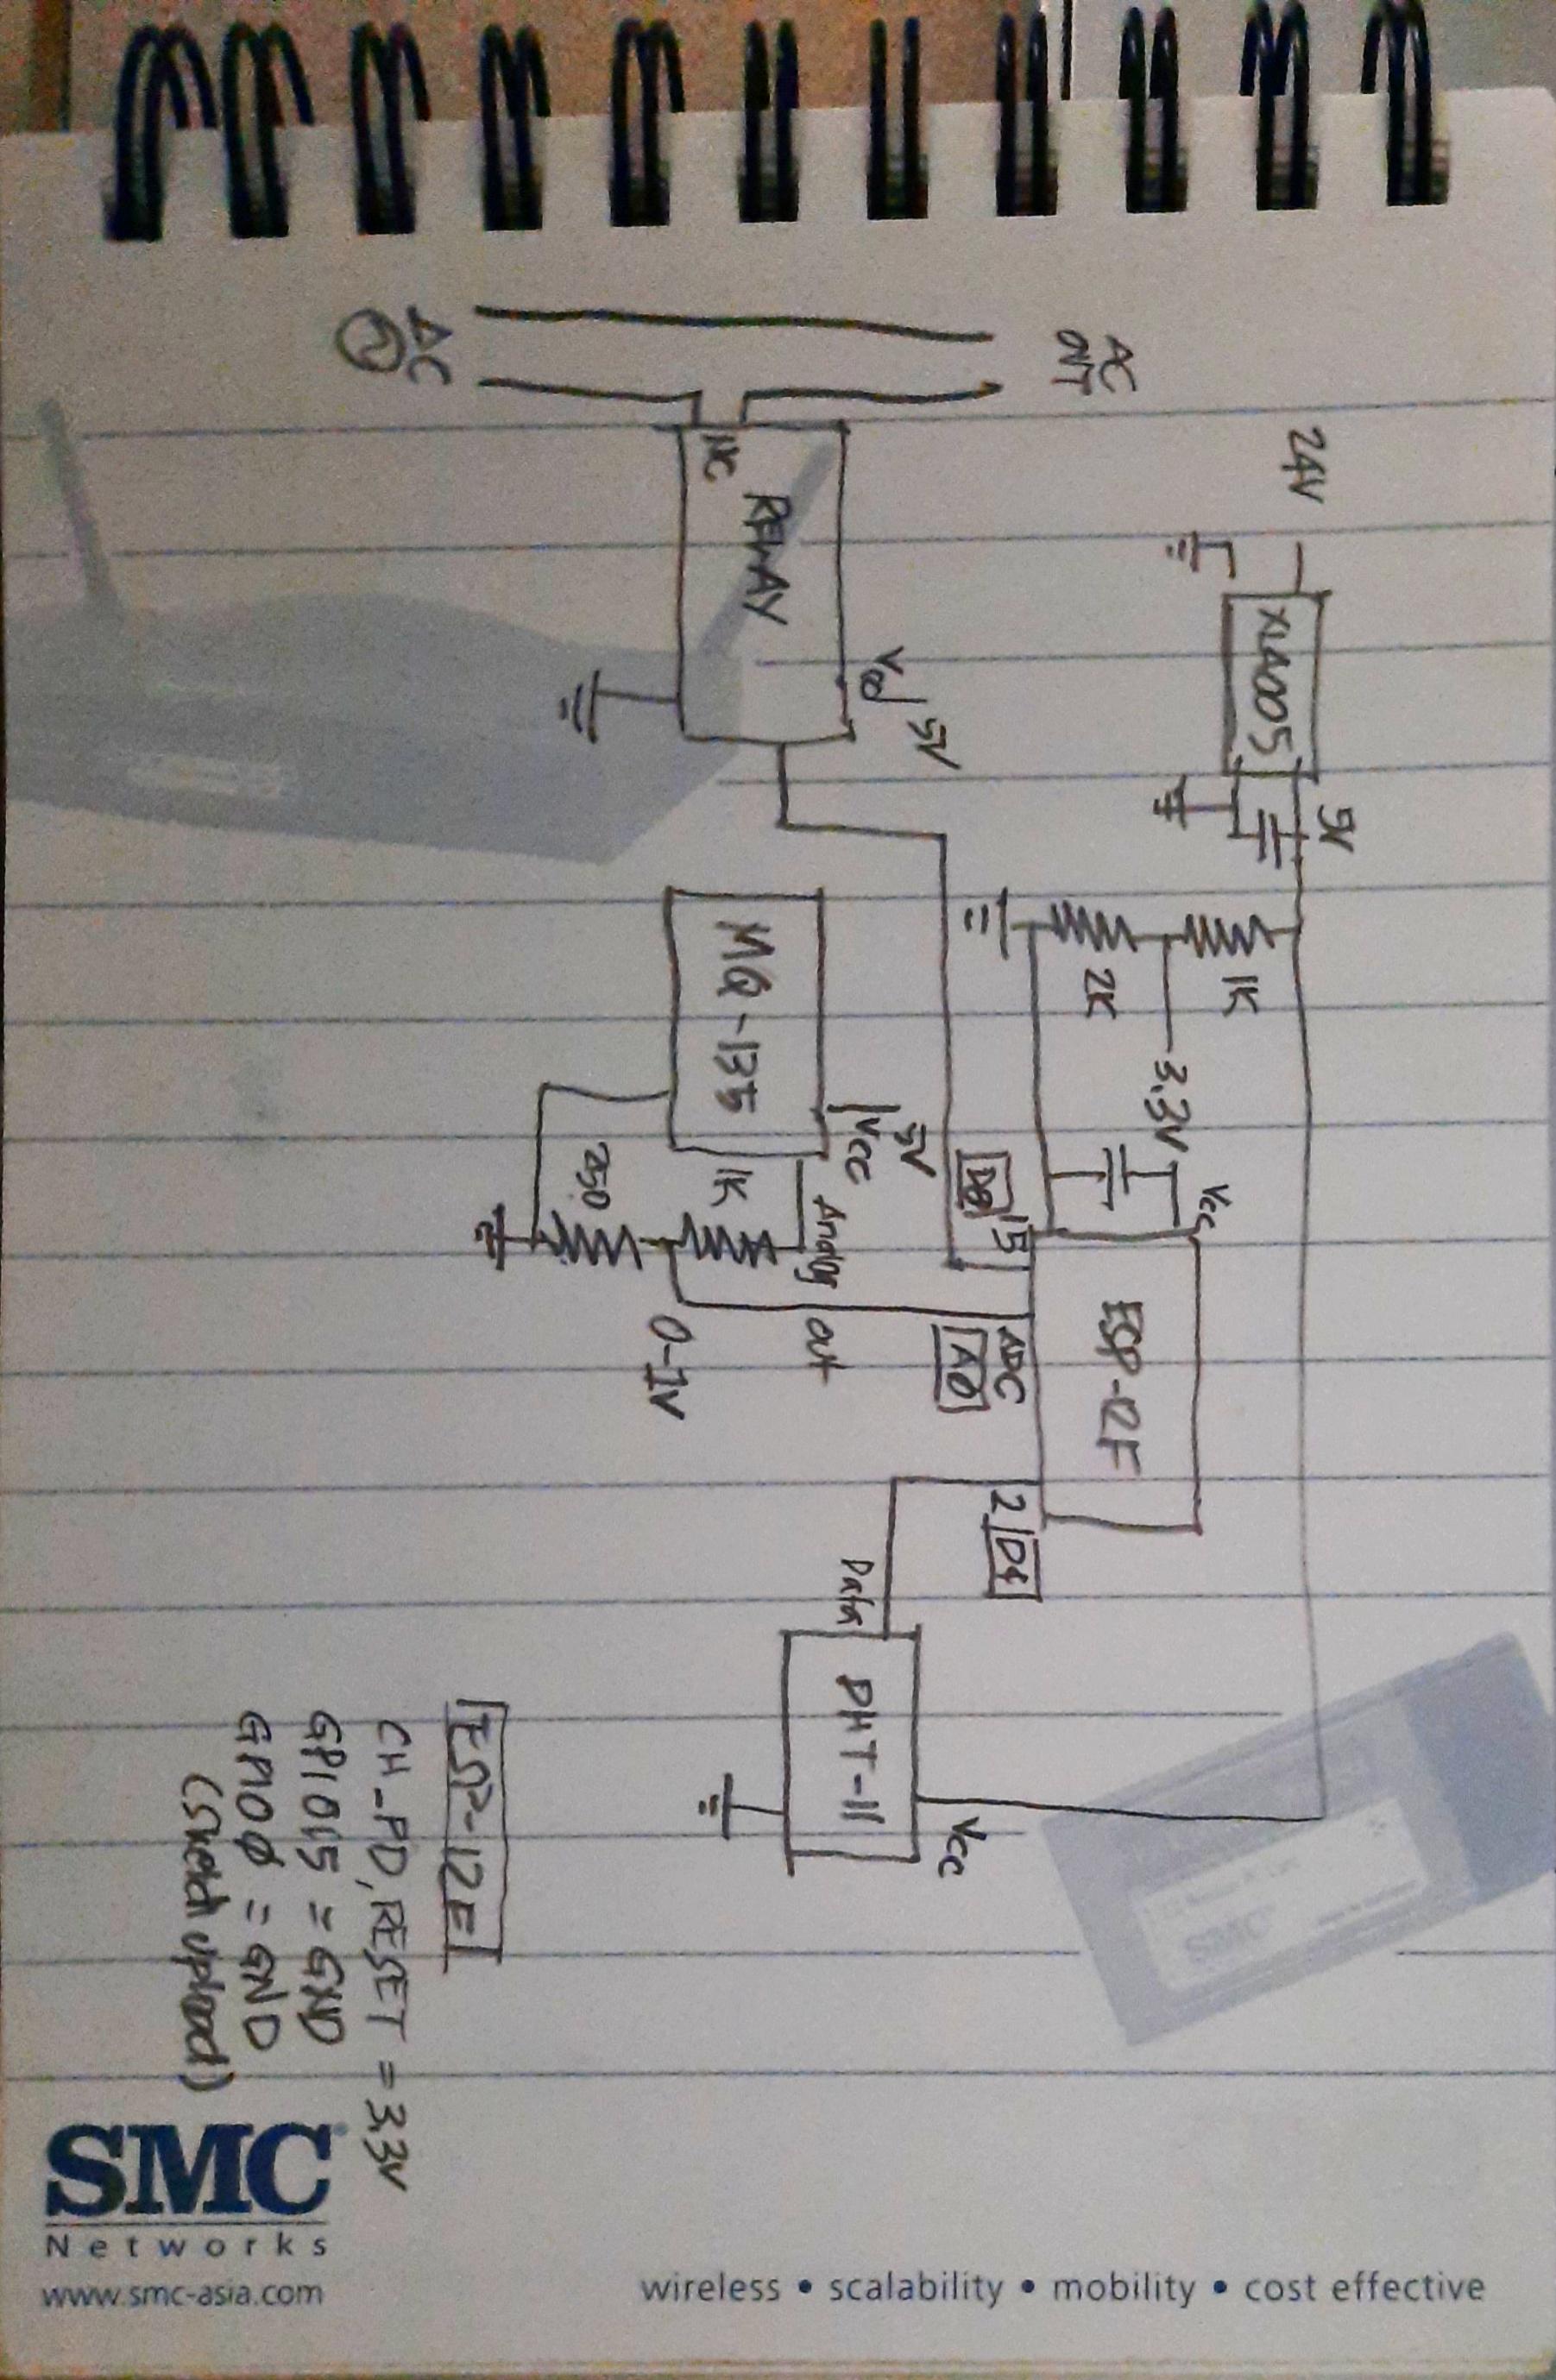
It's relatively easy connecting everything on a breadboard. I ditched the XL4005 because the circuit is now powered from the USB.
Here are the changes from the original schematic
- Initially, I thought I had to normalize the input voltage from the MQ-135 analog output to 1V, but this DHT sensor library says otherwise. I used the values R1 = 1K, R2 = 2K for the voltage divider putting out 3.33V into the D1 mini analog input (A0).
- I didn't change the DHT-11 RL resistor which is 1K ohm and instead used the software to compensate via MQ135.setRL(1)
- The relay trigger will now come from the digital output of the MQ-135 but will have to do a lot of testing and calibration. The original plan of using D8 to trigger the relay is still considered though.
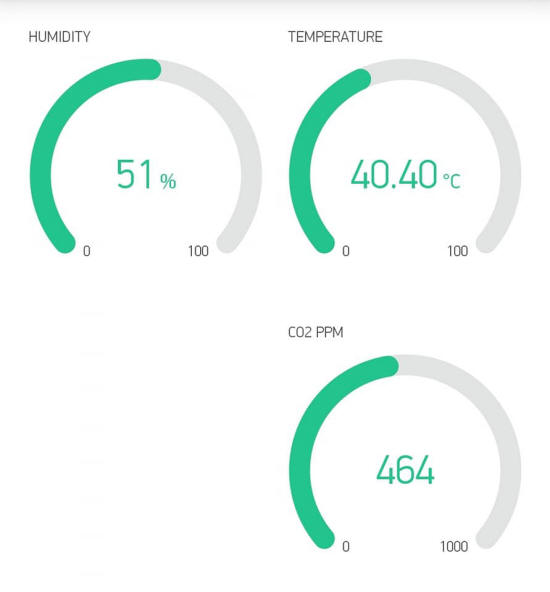
On the software side, a couple of options came to mind which includes Azure IoT that I've done in not so distant past, or totally new Samsung Smart Things. In the end, I selected Blynk because it's for lazy people like me!
The programming environment is still Arduino IDE and here's the code.
The following additional libraries are used:
- Blynk by Volodymyr Shymanskyy 0.6.1
- MQUnifiedsensor by Miguel Califa 2.0.1
This is how I setup the Blynk app display.
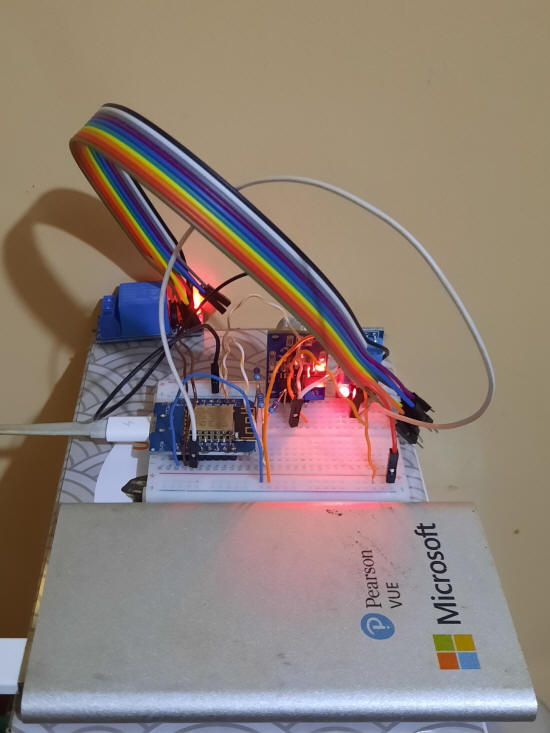
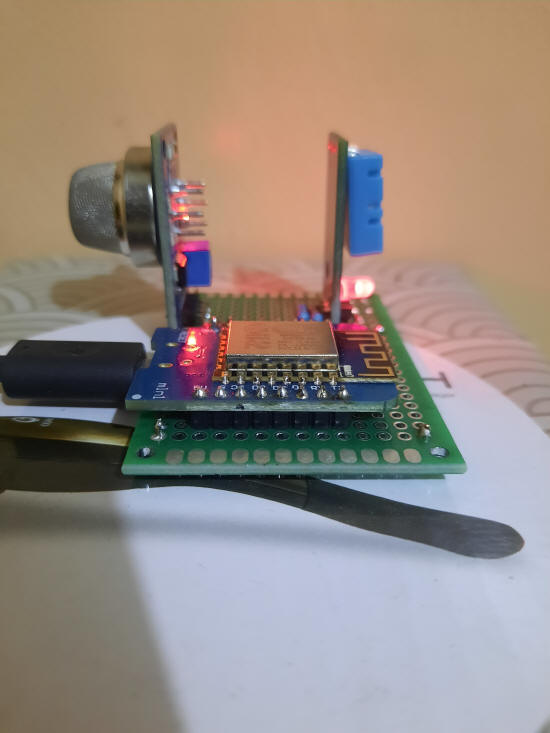
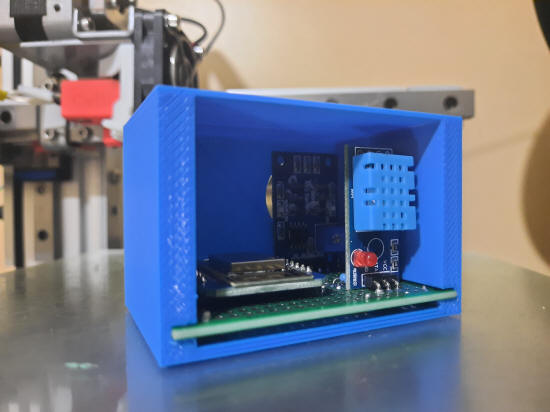
My new soldering iron arrived so from the breadboard to the prototyping PCB the circuit goes. Neat and clean.
The relay will be triggered remotely and there's plenty of room for a 3-wire connector.
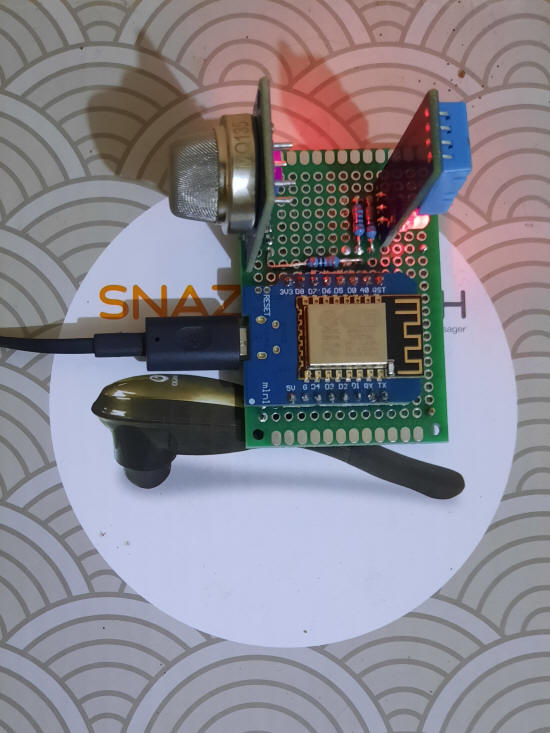
I quickly modeled a simple box in Fusion 360 and printed in on my Cetus Mk3 3D printer.
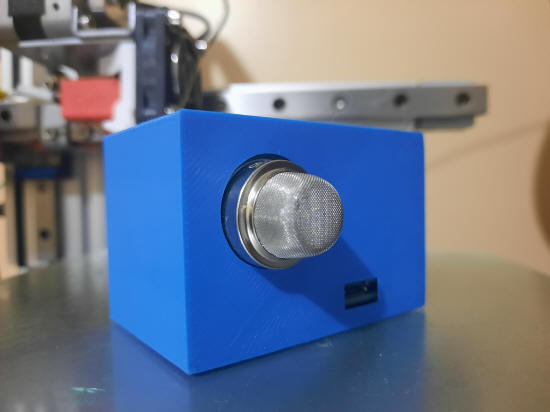
Looks sufficient and functional.
Now what?
I'm having second thoughts using the MQ-135 as a smoke detector because I burned a piece of acoustic foam to produce smoke but the sensor reading didn't change. Well, I did it in open air so kinda useless as a test.
The other option is to drive an exhaust fan because I discovered that the internal temperature reached almost 50° C while doing a 5-hour 3D print job.