The road to nirvana |
|
My journey into Photography, Horology, and Audiophilia |
My review of the Digital Power DP110 Studio Flash Kit
I'd like to learn studio lighting but I'm not ready to spend big bucks for it. Fortunately, there are many China-made products available and that gives budget-crunched people like me a few options.
Among the starter kits available, I found the Digital Power DP110 Studio Flash Kit which is selling for about P11,000 from JT Photo in Makati. Because it's so cheap I decided to buy it together with a studio backdrop stand (Amnova, model AS-V306) and a white backdrop. These will give me the capability to put up a small studio that I can set up anywhere.
The DP110 came with the following items:
- 2 x light stand, max 6ft tall
- 1 x light stand, max 4.5ft tall
- 3 x studio lights, 110W
- 1 x flash trigger
- 1 x 2-in-1 22" reflector (gold and silver)
- 1 x 36" umbrella, black and silver
- 2 x softbox, 50cm x 70cm
- 1 bag, where all these can fit in
Build
The body of the flash heads are made of plastic and one serious drop could mean the end for it. Manufacturing quality is decent though. It does not come with a cover to protect the flash and modeling light, and even though they're recessed, we'll never know when shit happens.
The light stands are nice, made of lightweight aluminum with matte black finish. Each light stand is telescoping with three sections, but they're not air-cushioned, so care must be taken when using the quick-release for each segment, specially when your studio light or a speedlight is mounted. The three feet are easily extended, and adjustable. There's no rubber cup provided for the feet, and it may slide on very smooth floor.
Assembly
Putting up one light, with stand and softbox will take a few minutes.
The light stands are so easy to set up, and will take a few seconds. I'd like to set it up in a way where the three feet a spread wide apart to the maximum, for better stability. These stands are light, so you may want to consider adding some weight near the center point.
The flash heads have their own adjustable mounting bracket that sits directly on top of the light stand. It is secured using a screw-type fastener. There is a locking hole to hold the umbrella. So with two screw-type fasteners, I can swivel and tilt the flash head.
The softbox assembly will take most of the time. It takes me about five leisurely minutes to complete one. Once assembled, I can fit it over the studio light head and secure it via four screw-type fasteners.
Features
The flash head has a Guide Number of 36 and color temperature of 5600K. Two switches are provided, one for the main flash and one for the modeling light.
To control the power output, you can turn a step-less control knob which varies the power output from 1/1 down to 1/8.
The modeling light power is set to track the power setting of the flash, and there is no other option.
Due to the low cost of this package, I don't get an audible signal when the flash are charged and ready to go. It recharges in about 2 seconds at full power and it's not a big deal for me, but could be for some.
There is also no "dump" feature and again, it's not a big deal as I can just trigger it after changing the power settings, prior to metering.
A remote receiver is provided, and is attached to one of the flash heads. The receiver is powered by two AAA batteries, and has a small power on/off switch as well as channel settings via DIP switches. The receiver channel setting should obviously match the transmitter setting.
Each flash head has a slave function and that causes them to trigger simultaneously from a single receiver.
The supplied transmitter mounts on the hot shoe terminal of my camera. It has a visual indicator (red LED) and a manual trigger button for test firing or dumping. Underneath the transmitter is the DIP switch and should be configured to match the settings of the receiver.
Output
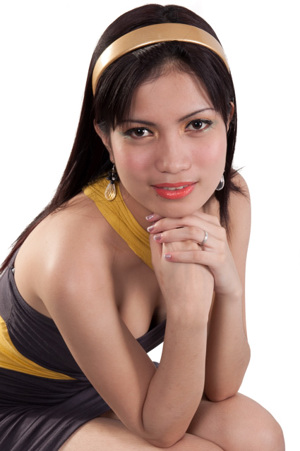
This is a photo taken using the DP110, not bad for a cheap studio light kit.
