The road to nirvana |
|
My journey into Photography, Horology, and Audiophilia |

Wood carving Mother Mary with the Snapmaker A250
June 19, 2020
I wanted to do some wood carving to give to my mother and I selected
What you'll need
- 180 mm x 135 mm Pine wood
- 3.175 mm flat-end milling bit
- 0.25mm ball-end milling bit
- Snapmaker A250
- Mother Mary model by Isu45-3dmodels
- Fusion 360
- Snapmaker 2 post processor installed
- Boboaldo tools installed
Using a 3D model (mesh/STL) in Fusion 360
I'm not going to repeat what I have written in my Gladiator article, so please refer to it for the details.
Instead, I am going to focus more about the tool selection and the configuration in Fusion 360.
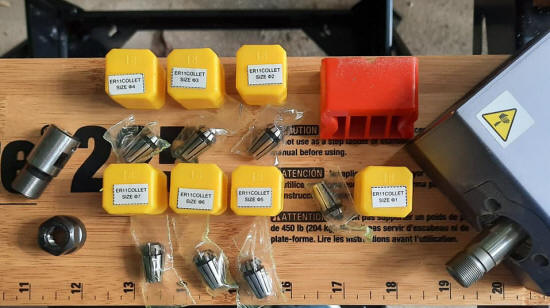
The tools
The ER11 collet included in the Snapmaker 2 package accepts 3.175mm size shank, and came with one (1) 1.5mm flat-end mill, and one 3.175mm ball-end mill. These two are not really useful for what I wanted to do and that's the reason the Gladiator project needs to be carved again with the proper bits.
So this is the first tranche of my toys for the Snapmaker 2, ER11 collets from 1mm up to 7mm. Snapmaker said they support only up to 6mm collet size, so the 7mm will not be useful, for now.
I really wanted to own Amana bits, but the thought of breaking a $36 dollar bit due to the despicable Go To Work Origin behaviour of the Snapmaker 2 makes me cringe.
I found a company offering an extensive catalog of "toys" that made me salivating. Visit the Boboaldo website to see what they offer, and since they're in AliExpress I decided to do my shopping there.
I came up with these bits:
- 2mm flat-end mill
- 3.175mm flat-end mill
- 0.5 ball-end mill (CEL=20mm)
- 0.5 ball-end mill (CEL=15mm)
- 0.25 ball-end mill (CEL=15mm)
- 0.25 ball-end mill (CEL=20mm)
- 60º V-bit, 45º V-bit, 30º V-bit

If you're interested in loading these tools' data into your Fusion 360 CAMTools folder, I created a public link for you to download the file.
Configuring the CAM (computer-aided manufacturing) setup

In the Setup tab, make sure operation type = Milling. I like to work from the center and that's why the Orientation = Model orientation. If you want to set it elsewhere, like the lower left corner, then it's your call. Origin = Stock box point, Stock Point = Box Point. Now comes the important part, Model = Mesh. While the grey area is the size of the wood I'm going to use as stock, make sure you selected the STL model (mesh) to define the Model parameter.
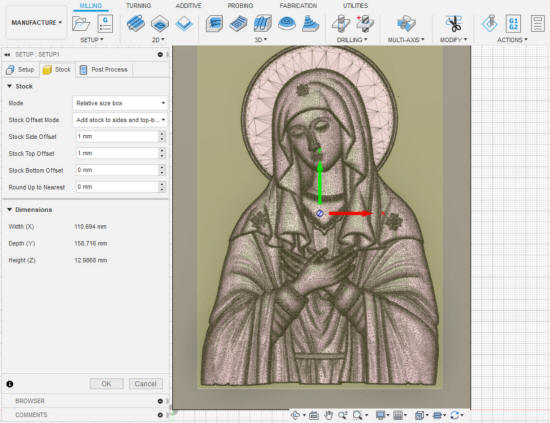
In the Stock tab, just use those parameters.
Roughing pass
I need to clear as much wood as fast as possible to minimize work time, at the same time make sure that the next pass, the finishing pass will not have to deal with too much "left-overs" from the roughing pass.
The bit I used is described here, it is a carbide bit with two flutes and is identified as model 2LX3.15. Here's the configuration in Fusion 360.

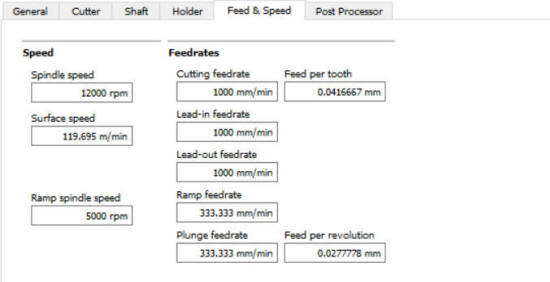
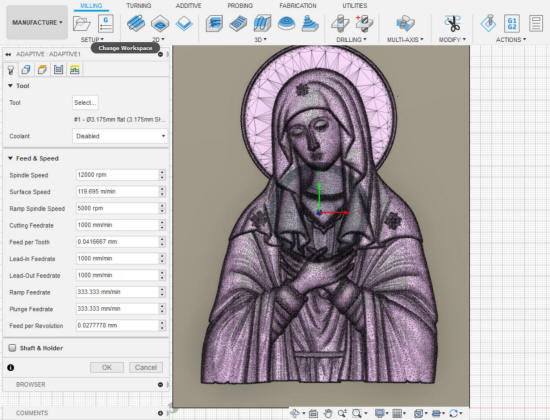
Here are the configuration for the 3D Adaptive operation
The Tool tab
The Geometry tab
The Heights tab

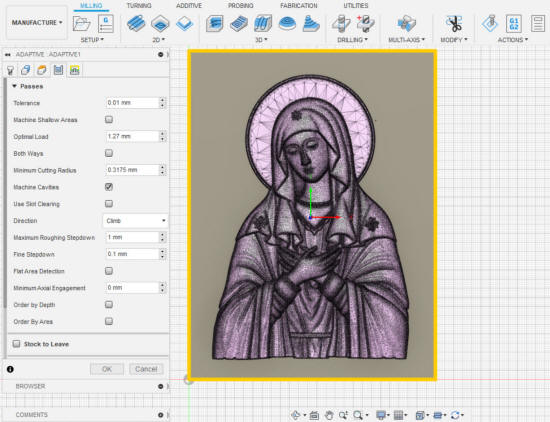
The Passes tab.
Change the Tolerance to 0.01 mm. Clear the Stock to Leave. The Maximum Roughing Stepdown is 1 mm because I'm using Pine, a kind of wood with hardness of < 1000. If you're going to use another type of wood with hardness > 1000, this should be set to 0.5 mm.
Once the configuration is complete and the toolpath has been generated by Fusion 360, right-click on the adaptive operation and select Post Process to export the .CNC file for loading into Snapmaker Luban.
Leveling the tool head
Before you run the job, make sure to level the tool head and run a boundary.
- Make sure the tool head is in the home position, if not send it home.
- I usually mark my wood with a X to determine the center point where I'll position the bit. While it is relatively easy, I was thinking of making a laser-guided device to let me do this in a cool way. The parts are on order and I'll find out soon.
- Assuming the stock is dead center, I move the X axis first and it will take 14 presses of the right arrow when in set 10 mm increment. That's basically 140 mm something.
- I'll then move the Y axis, and it will take 12 presses of the down arrow to positiion it near the center.
- I then lower the Z axis and make sure it's about 10 mm away from the stock and do the fine tuning.
- When the bit tip is just about the center, I use the 1 mm and 0.1 mm adjustments and make sure the bit just touches the stock. Some people might cringe at this procesure which I'm totally comfortable with, so I also have another project to address this leveling process using another tool. It's not going to be integrated into the firmware, as I don't have the capability to do that.
- At this position, set the work origin.
- IMPORTANT: do not move the X or Y axis, or run a boundary because if the stock is not level, the bit will scrape the higher portions of the stock and snap. Raise the tool head some 40 mm before running a boundary.
- IMPORTANT: after setting the work origin, NEVER push Go To Work Origin because the firmware is dumb (as of 1.9 version) that it will move the tool head along its X, Y, and Z axis simultanously. Depending on where the tool head was, say in the home position, that operation will cause the bit to hit the clamps or again scrape the stock.
I prefer running the job untethered, so I'll just send the CNC file to the A250 from Snapmaker Luban via Wi-Fi.
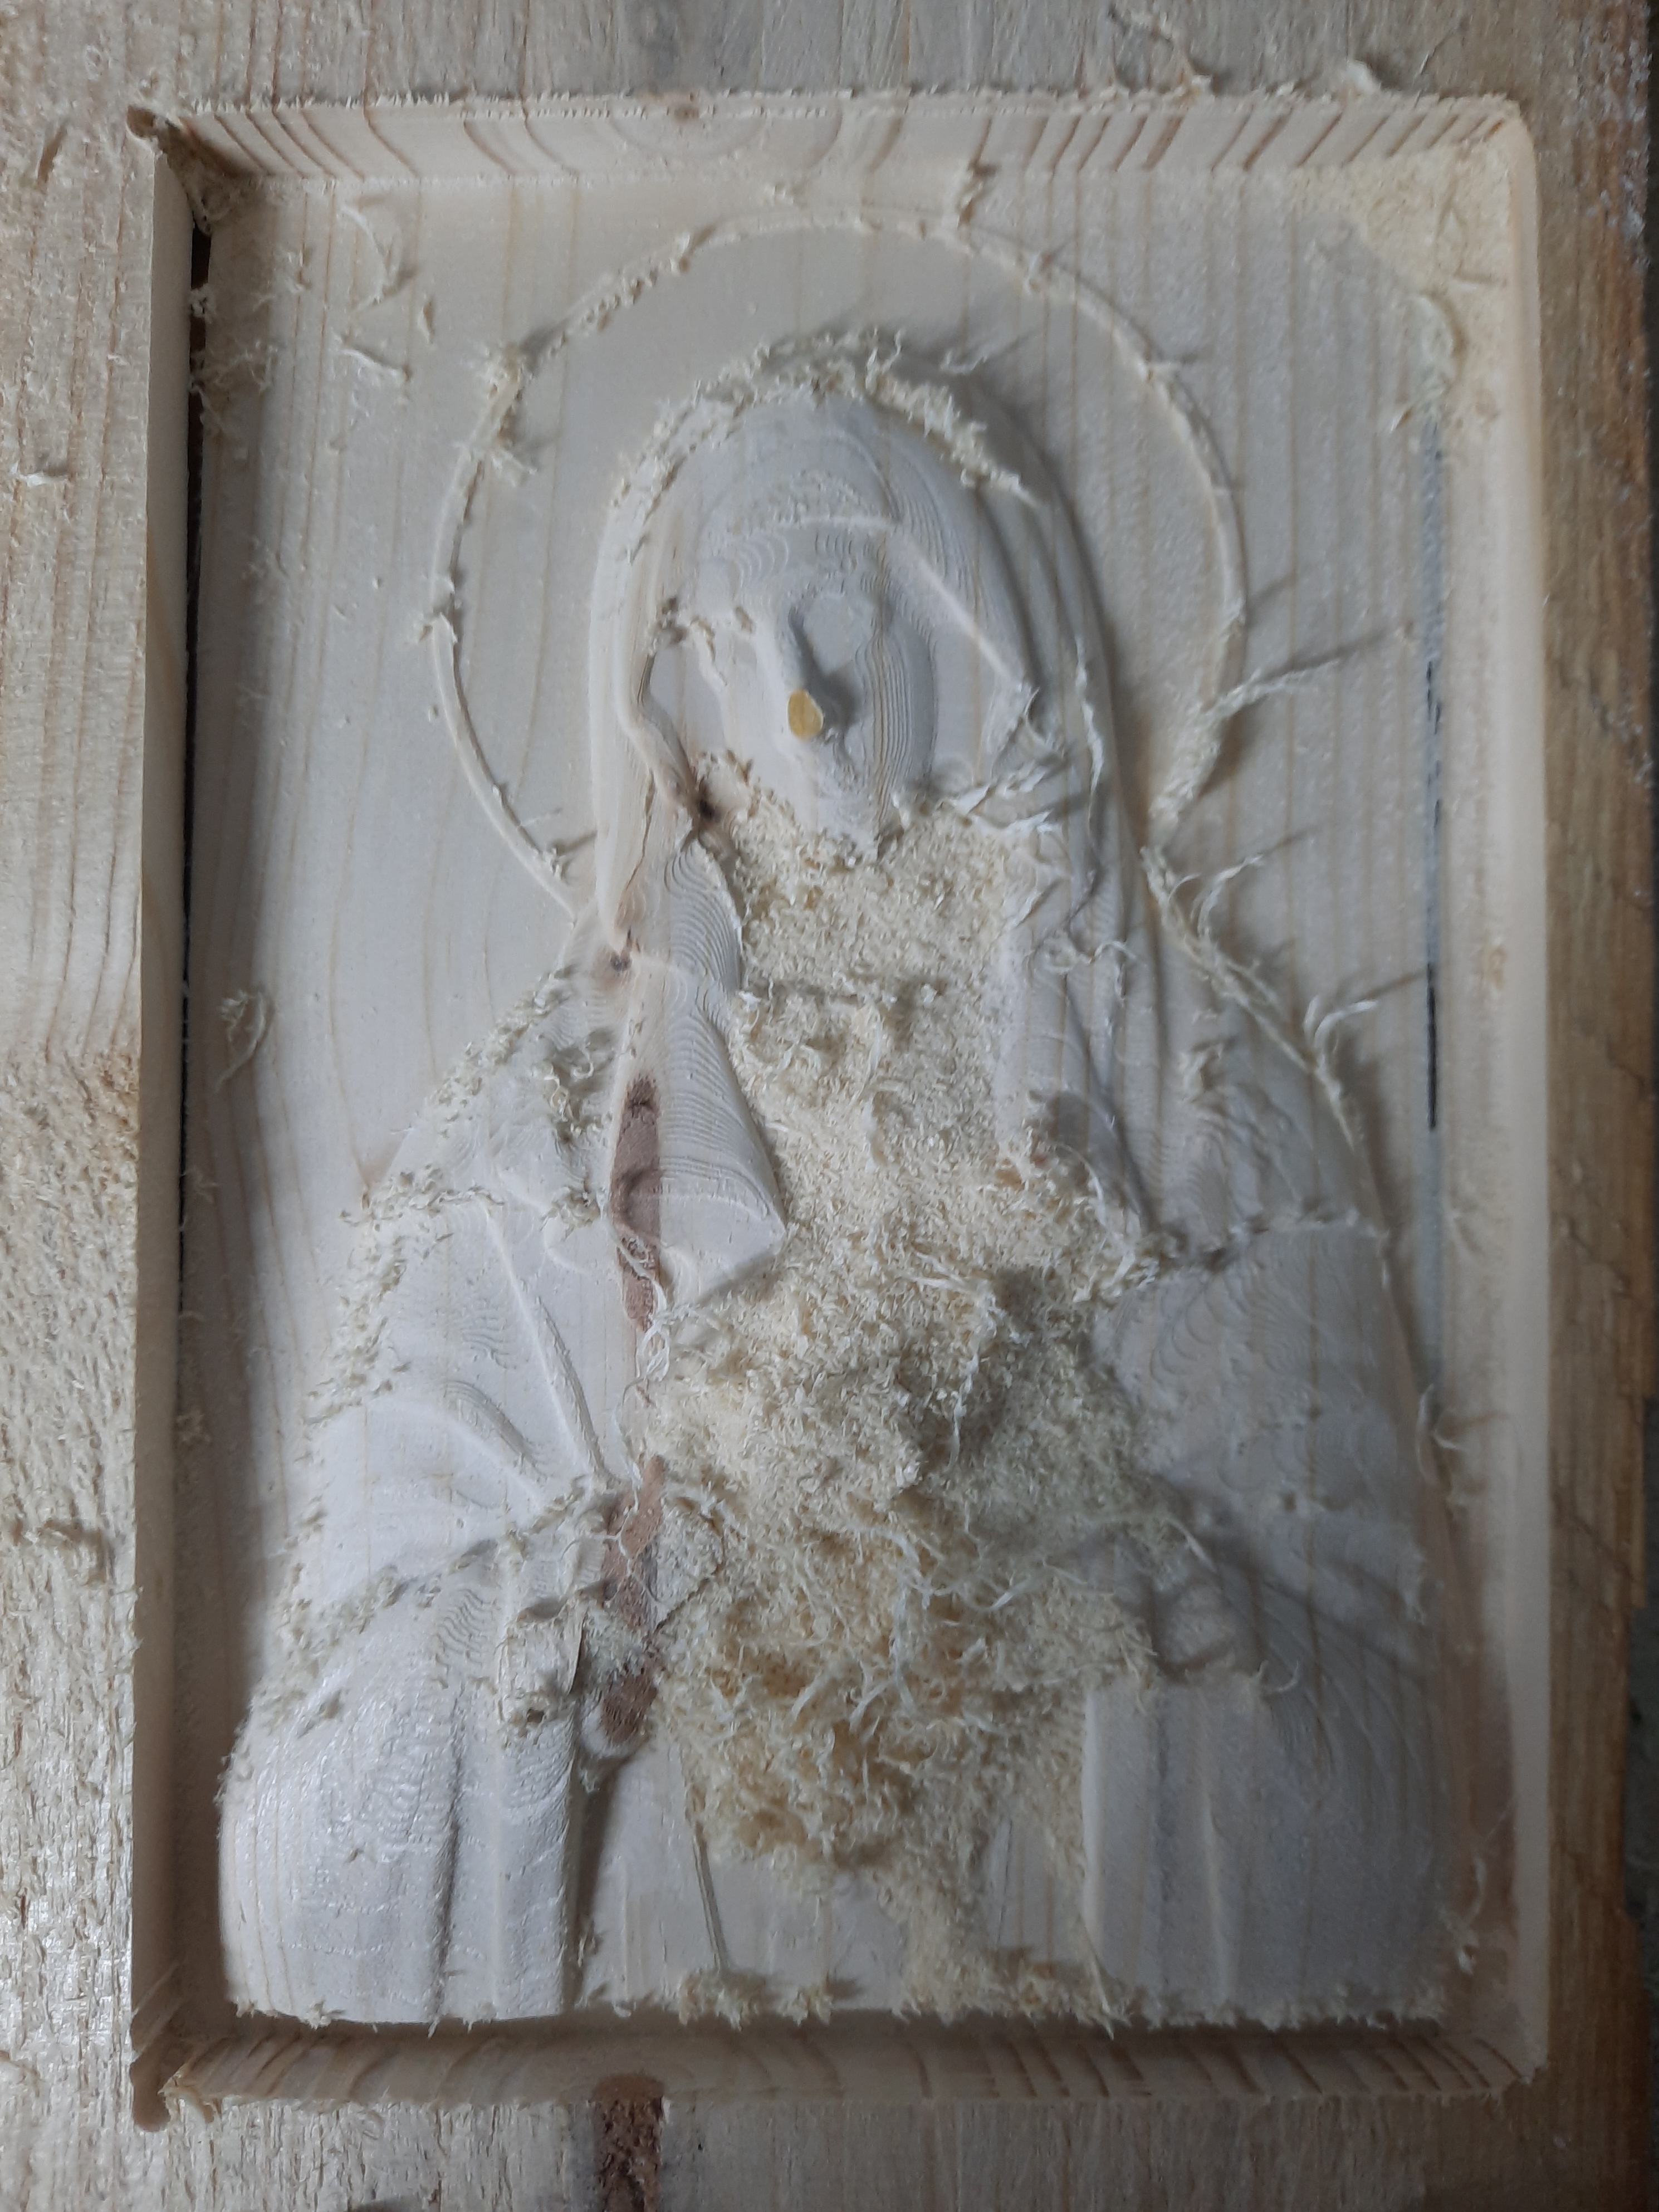
Here's the result from the roughing pass using 3D Adaptive.
Time for, a Tool change...
I changed the bit for the next operation which is 3D Parallel. After installing the 0.25 mm ball-end bit, I just need to set only the Z height and making sure not to change the existing X and Y settings.
I could visually spot level the bit on the remaining stock, but as previously mentioned, the wood is kinda warped. Then I noticed this flat spot on the nose, so I did a "pick on a nose" kinda thing by using that point as the reference. It was amusing, for me.
_LI.jpg)
Finishing pass
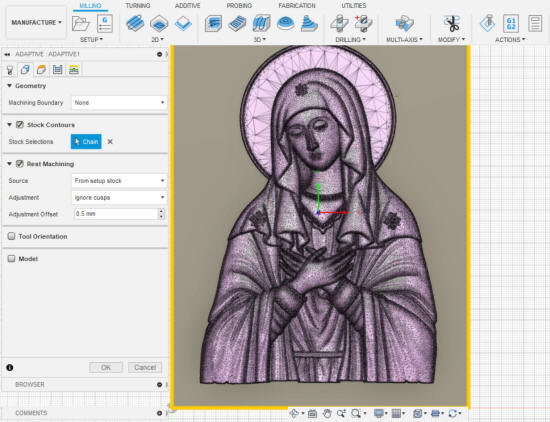
For the finishing pass, I selected the 3D Parallel operation in Fusion 360, and here are the configuration.
The bit used is described here, it is a 0.25 mm ball-end mill designated as model 1835.
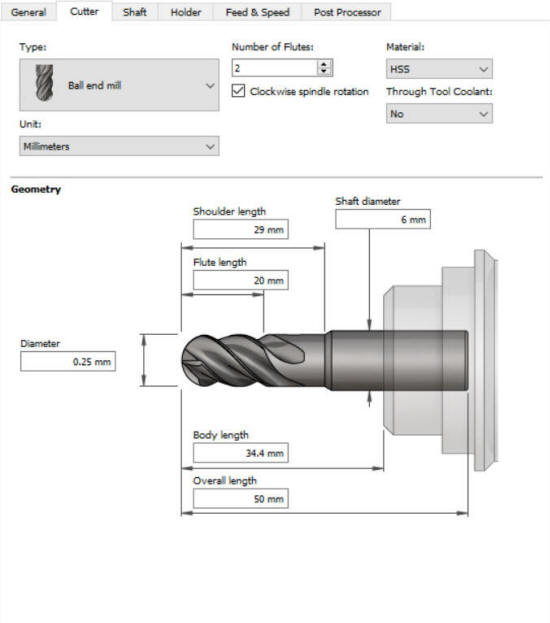
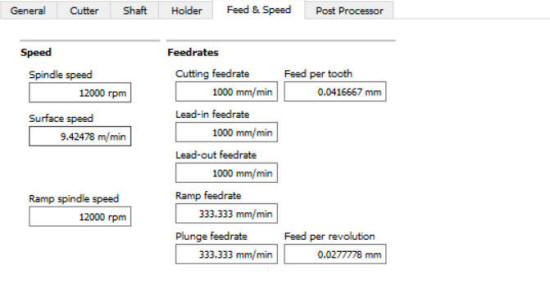
The Tools tab

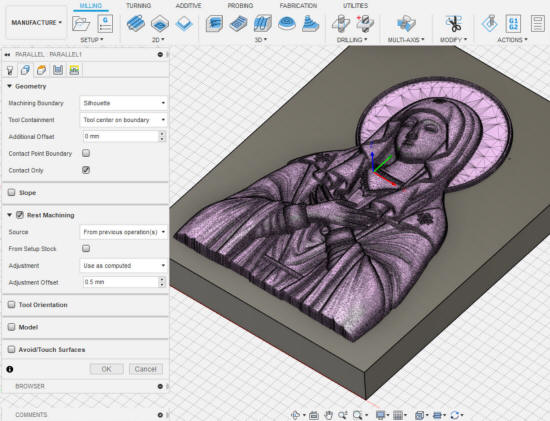
Geometry tab
Tool Containment = Tool center on boundary. Enable Rest Machining because we're taking off from a previous step. Source = From previous operation(s), Adjustment = Use as computed, Adjustment Offset = 0.5 mm.
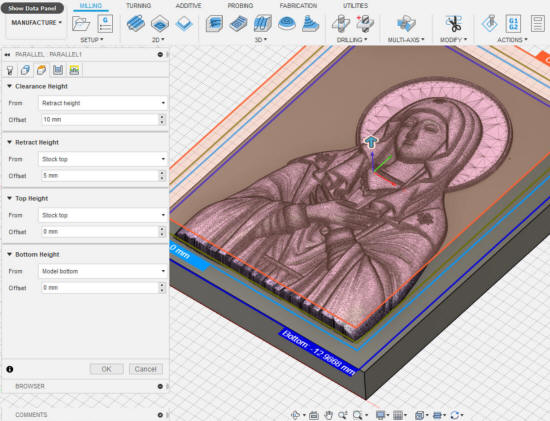
Heights tab
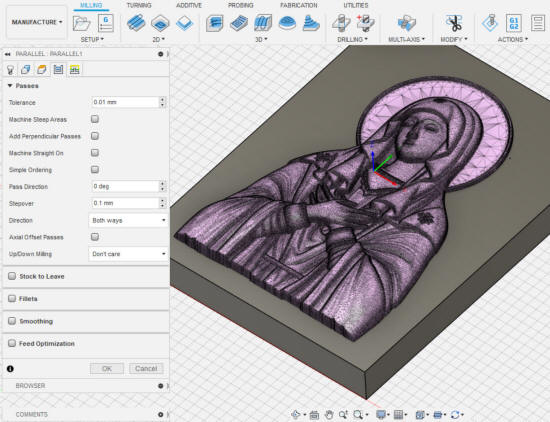
Passes tab
Tolerance = 0.01 mm. Stepover = 0.1 (I'd like to set this to 1/3 of the diameter of the cutter, but this is a good compromise) this will make the machining time jump to nearly 2 1/2 hours compared to using 0.125 mm which is less than two hours. Clear the Stock to Leave.
Here's the result of the finishing pass. I have not cleaned it up yet as my Dyson was still charging when I took the photo.